How to Make Chocolate Cherry Mice: The Cutest Chocolate Holiday Treat
By using this site, you agree to our Terms of Use. This post may contain affiliate links. Read our disclosure policy.
Follow us on Instagram for more fun food ideas for kids!
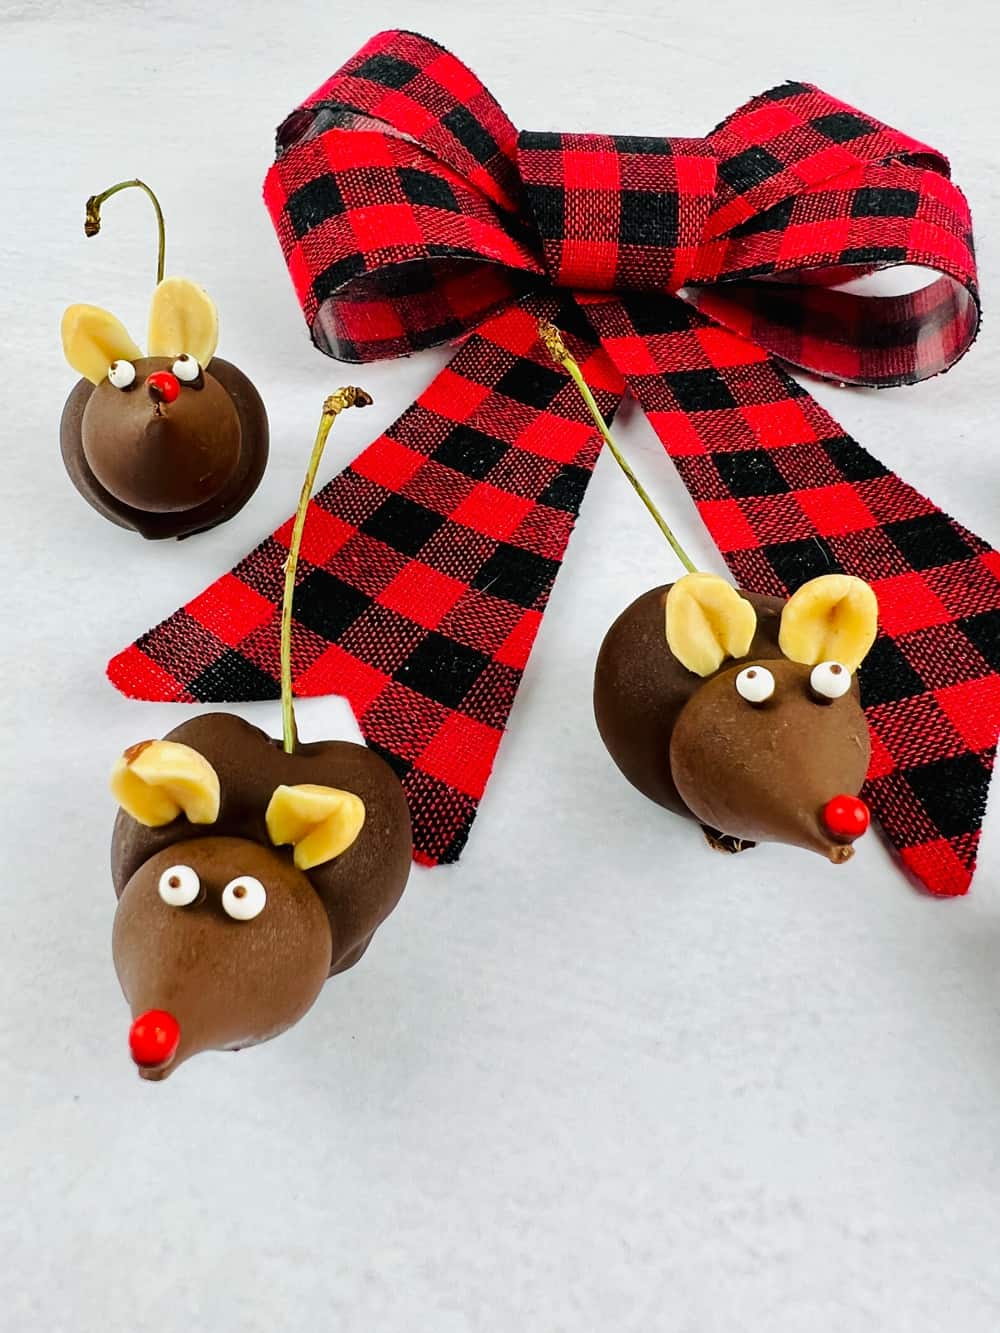
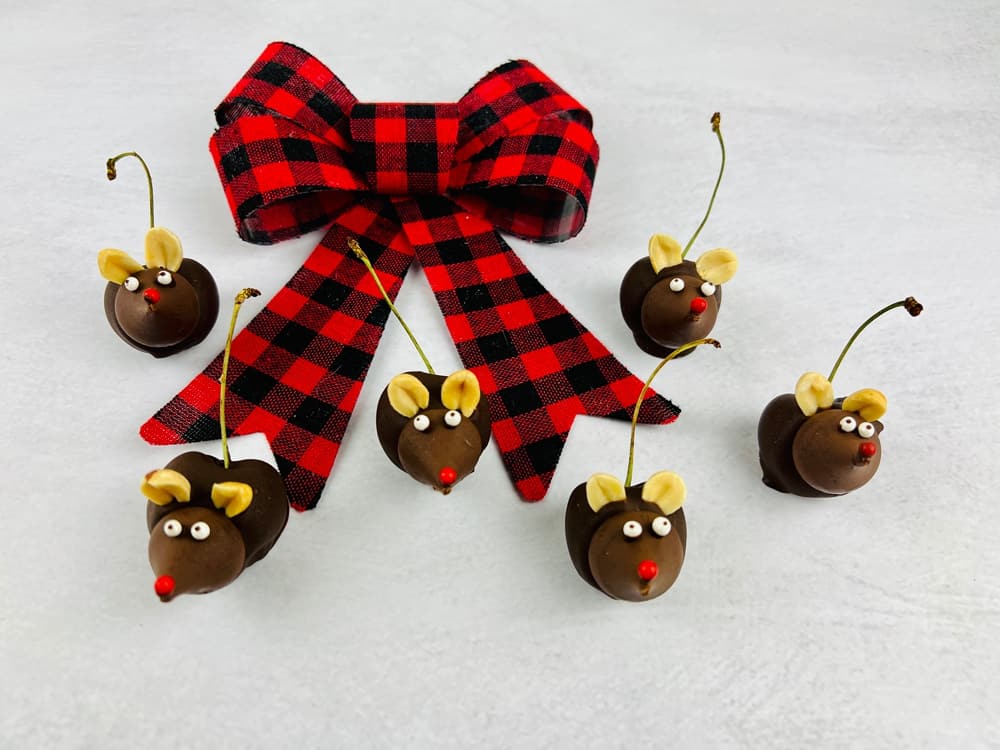
These cute chocolate cherry mice will make a fun treat or dessert to bring to your holiday party to share!
Made with dark chocolate and plump, juicy cherries, these super cute chocolate cherry mice are sure to please even the pickiest of eaters.
Some people are unaware that chocolate and cherries are a match made in heaven, but these delightful little treats are proof positive of that fact.
Perfect for stocking stuffers, office gifts, festive Christmas treats or just because, chocolate cherry mice are sure to bring a smile to anyone’s face this holiday season.
These mice are so easy to make, you’ll wonder why you didn’t try them sooner. So, get started on your holiday desserts today with these super cute chocolate cherry mice!
Let’s take a closer look at what makes these chocolate cherry mice so special, then learn how to make them into delicious holiday treats.
The Chocolate Cherry Mice Traditions
The Chocolate Cherry Mouse is a holiday tradition in many parts of the world. Families gather around the kitchen table to make these special holiday treats together.
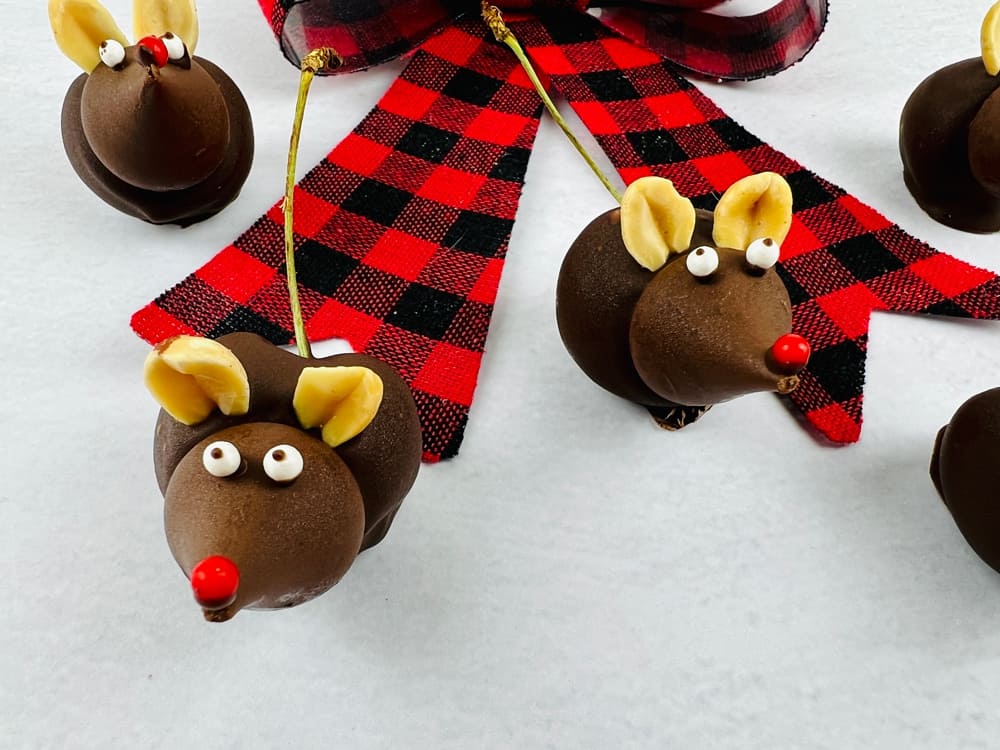
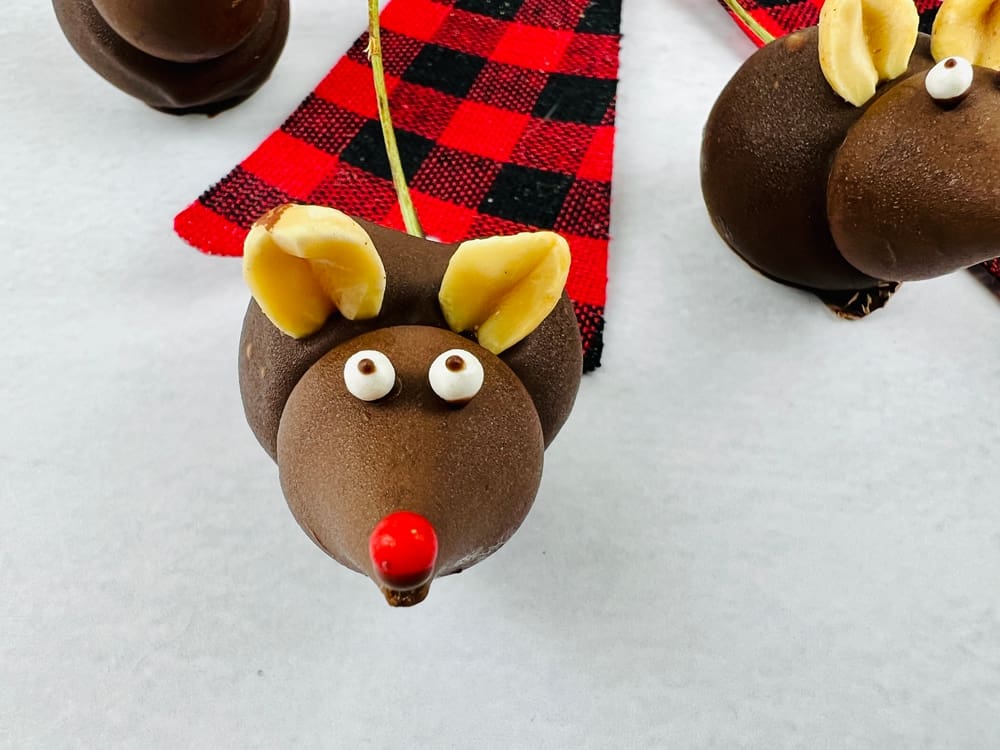
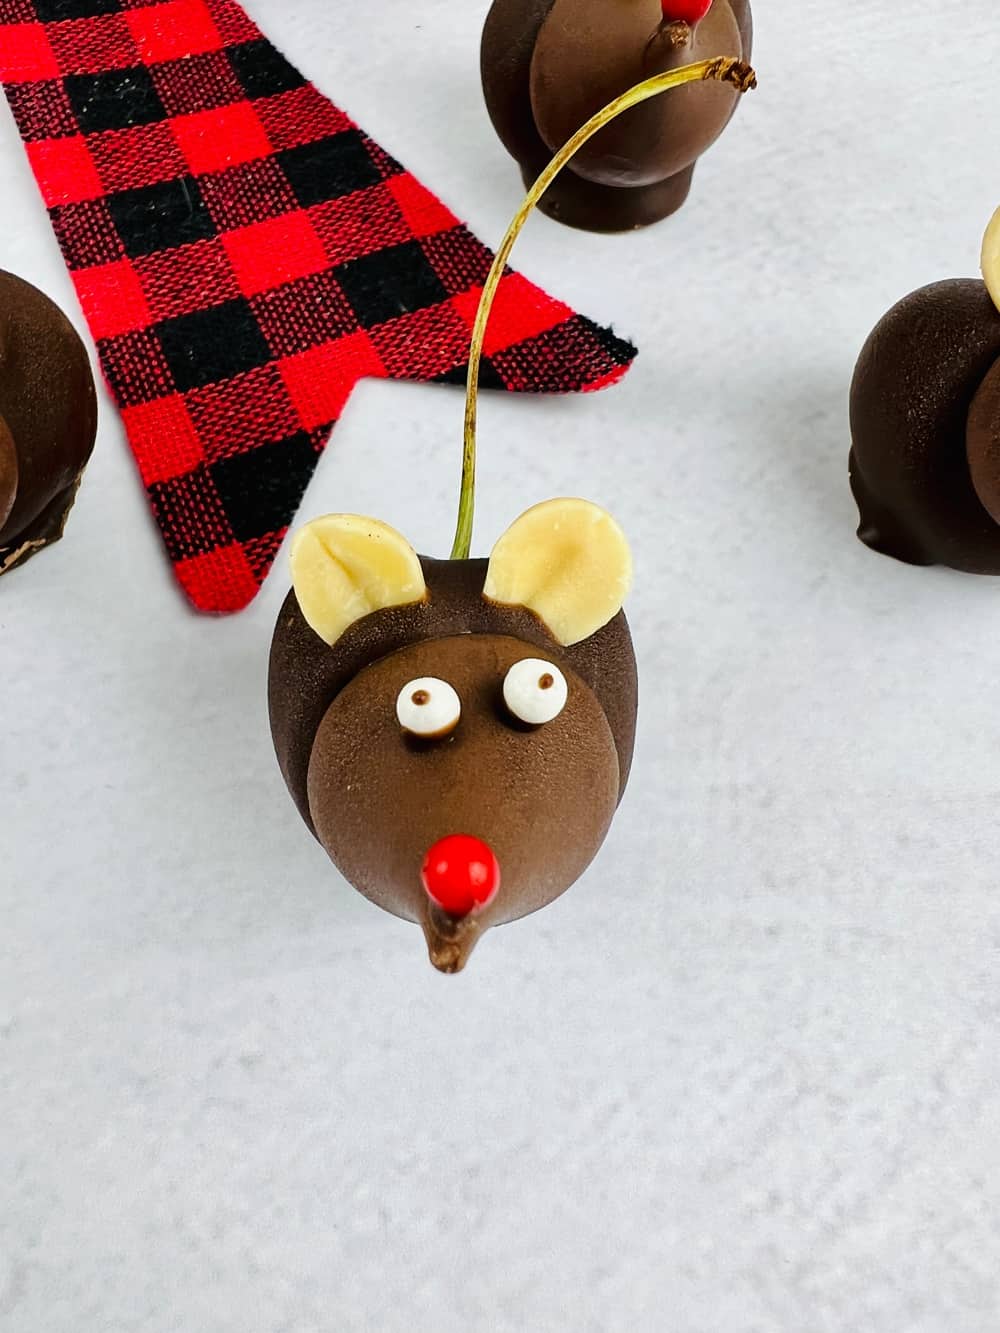
The mice are made from chocolate and cherries, with the cherry forming the body and the chocolate coating the outside. Then it’s finished off with a Hershey kiss and a few extras!
These mice are often given as gifts or used as decorations on holiday tables. For many families, making Chocolate Cherry Mice is an annual tradition that brings them closer together.
What You’ll Need:
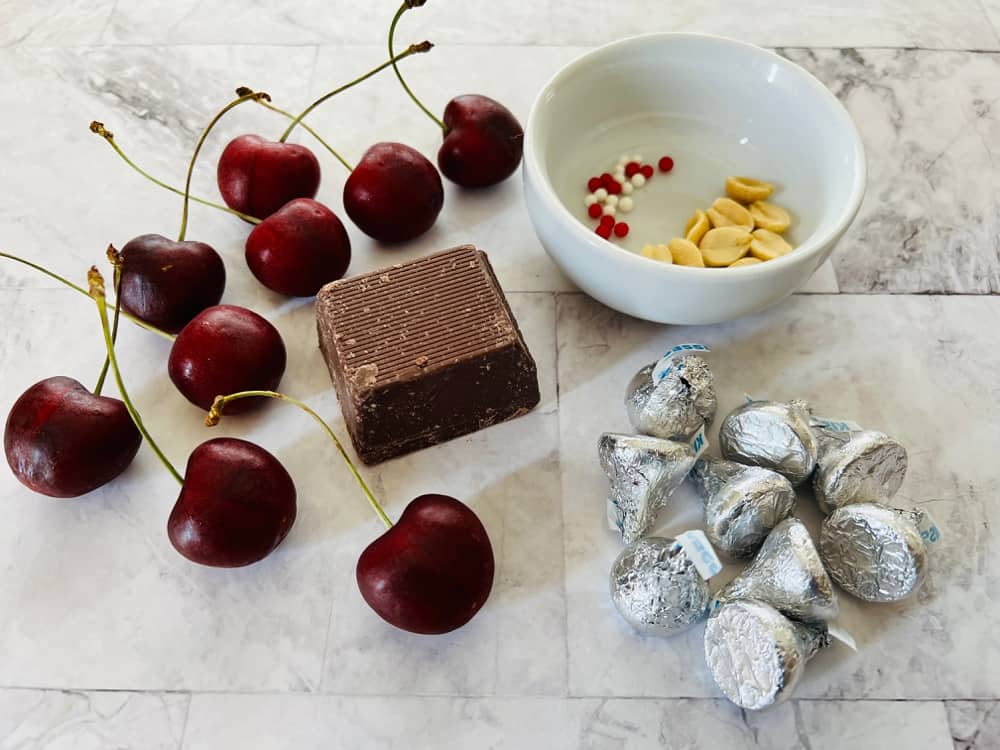
- Fresh cherries with stems
- 1 oz chocolate bark per 15 cherries
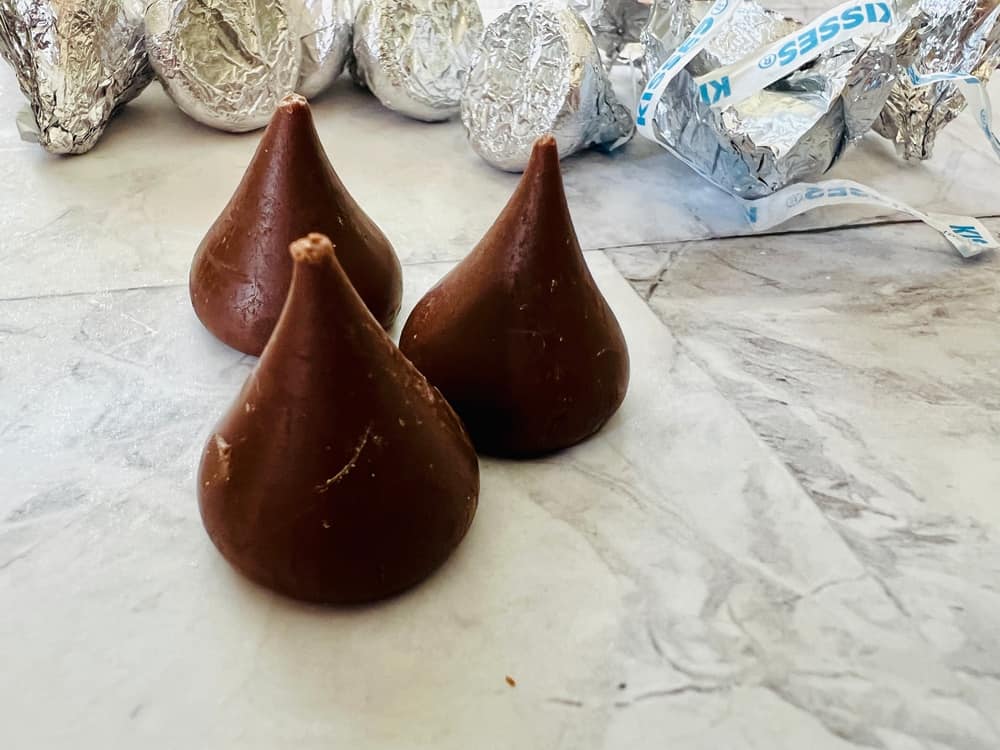
- Hershey’s kisses, one per mouse
- Peanut halves
- Red pearl sprinkles for the nose
- White pearl sprinkles for the eyes
How to Make Chocolate Cherry Mice
Step One: Prepare the Cherries and Chocolate
Start by washing and drying the cherries, then set them aside for later. Then, open the kisses, and put them aside for now. In the microwave, melt the chocolate while stirring until smooth.
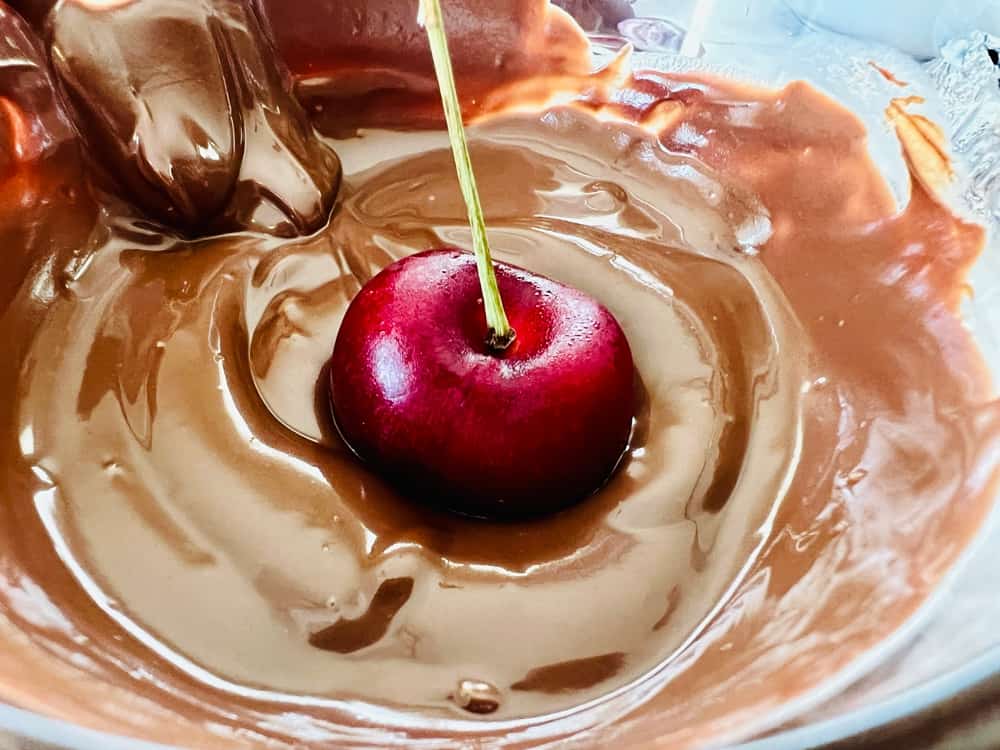
Next, dip the cherry in the chocolate, completely coating it. Make sure to shake off extra chocolate. After this, place the cherry on a baking sheet lined with parchment or wax paper.
Step Two: Place the Hershey Kiss “Head”
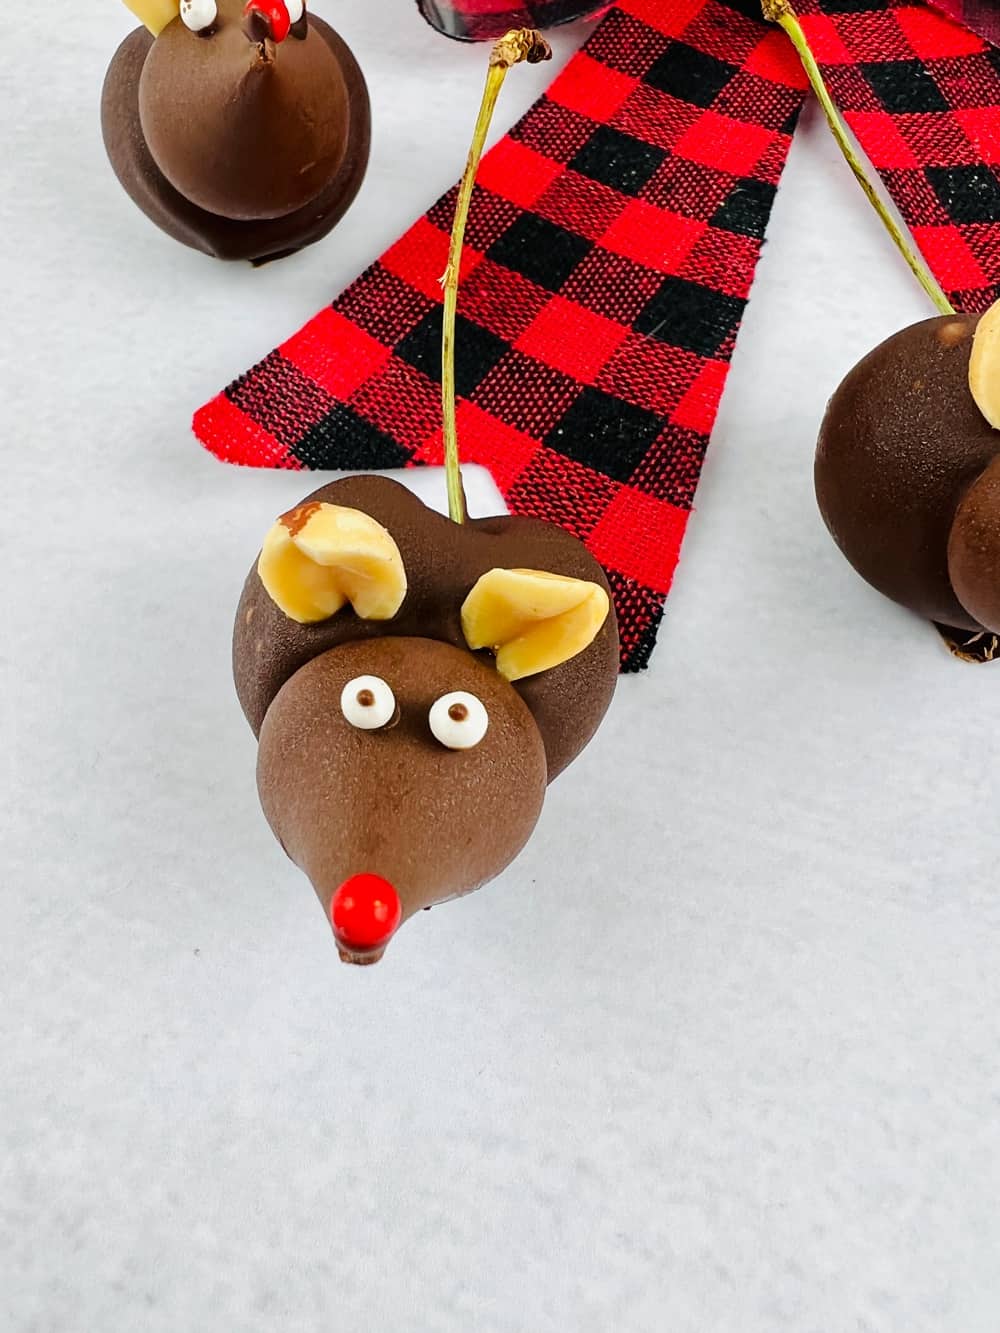
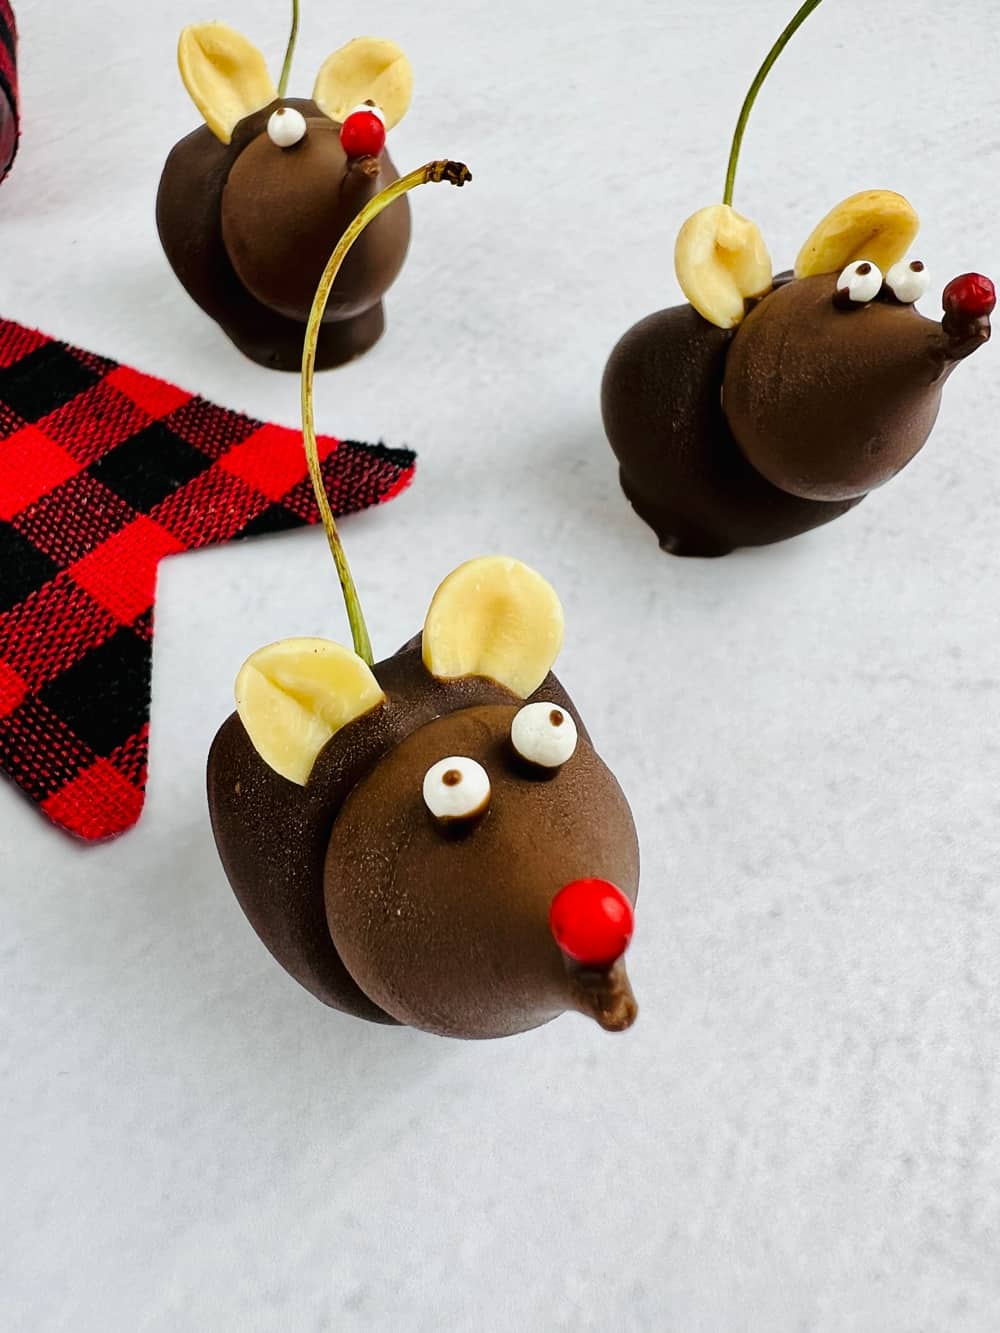
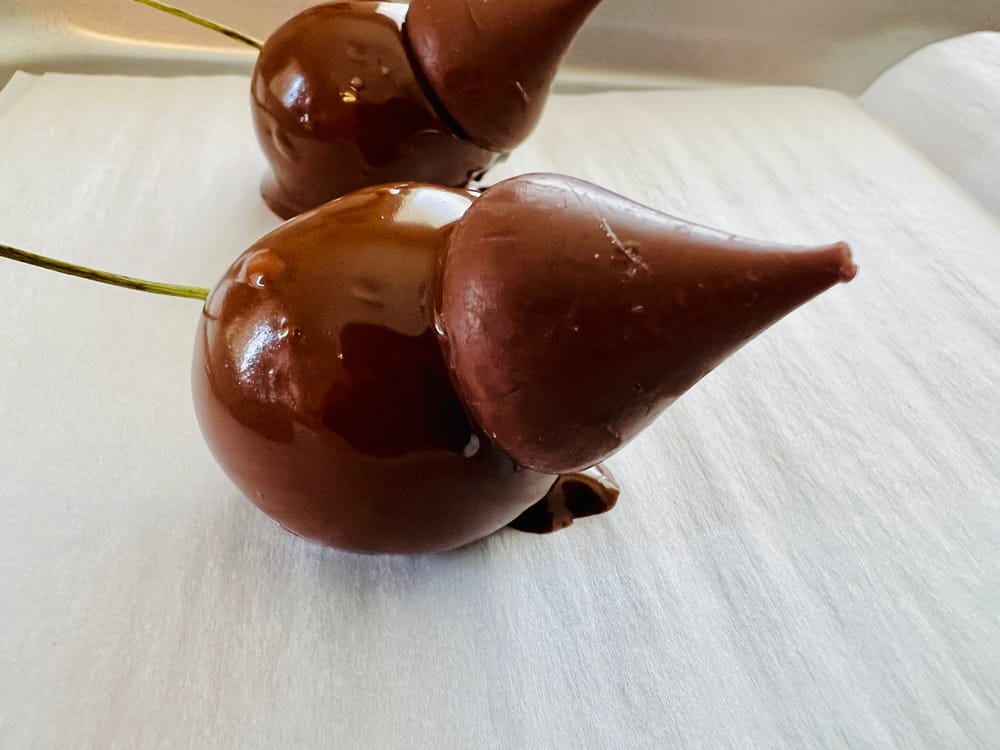
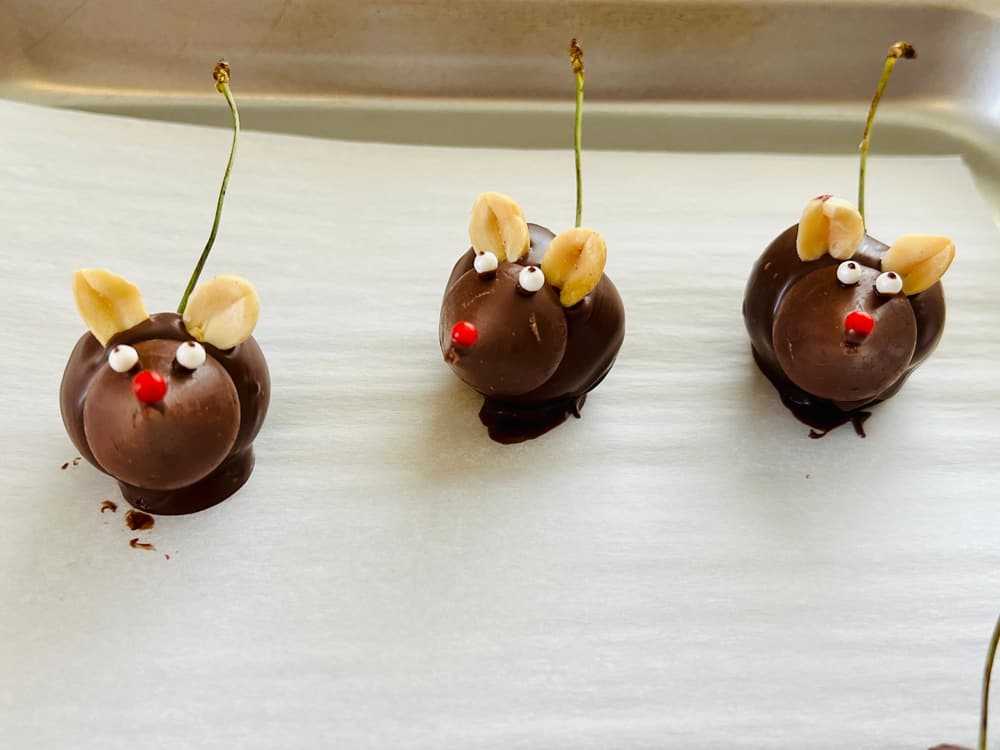
Next, place the kiss onto a chocolate-covered cherry, with the point facing away from the cherry stem tail. After this, place the peanut half ears behind the rear of the kiss and hold momentarily.
Then, place two white pearl sprinkles onto the mouse for its eyes using tweezers, adding a tiny dot onto the bottom side to help it stick. Make sure to add a chocolate dot to each eye to create its pupils!
Step Three: Complete the Final Decorations
Next, apply the red pearl nose to the tip of the kiss candy, placing a small chocolate dot onto the bottom to help it stick, and you’re done!
If you want, you can put your cherries in the fridge for 15 minutes to let them set before serving.
Tips for Decorating Your Chocolate Cherry Mice
Try Adding a Small Red Ribbon Bow Around the Stem
Try adding a small red ribbon bow around the stem. This will give your mice a festive touch that is sure to impress your guests. You can also use green ribbon if you prefer.
Many people like to add a small bow to the mice as well. If you decide to do so, ensure the bow is not too big or it will overpower the mouse. You want the mouse to be the star of the show!
Use Colored Chocolate
You can also use colored chocolate to make your mice. This is especially fun if you are making them for a child’s birthday party.
Simply melt some white chocolate and add a few drops of food coloring. Then dip your cherries in the colored chocolate and proceed with the recipe as directed.
If you want to get really creative, you can even make stripes by dipping the cherries in two different colors of chocolate.
Add Edible Glitter to the Red Pearl Sprinkle for the Nose
Adding edible glitter to the red pearl sprinkle for the nose is a great way to dress up your chocolate cherry mice for the holidays.
Silver and gold are the most popular choices, but you can really use any color that you like. Just be sure to use edible glitter so that it’s safe to eat.
A little goes a long way, so start with a small amount and add more if you want a sparklier finish. Your mice will look merry and bright with their new sparkling noses!
Get the right type of chocolate.
When it comes to decorating your chocolate cherry mice, you want to make sure you use the right type of chocolate.
The best type of chocolate to use is one that melts well and has a great flavor that will complement the cherries well, like dark chocolate.
You can also use milk chocolate or white chocolate, but dark chocolate is the best option if you want your mice to look and taste their best.
Melt the chocolate properly.
One of the most important steps in decorating chocolate cherry mice is to melt the chocolate properly. This will ensure that your chocolate sets correctly and doesn’t become grainy.
If the chocolate is not melted properly, it will be difficult to work with and will not give your mice a smooth, glossy finish. Chocolate almond bark or candy chocolate melts are best to use for smooth melted chocolate.
To melt the chocolate, you can either use a double boiler or microwave it in short bursts, stirring frequently until it is completely melted.
Takeaway
Now that you know how to make Chocolate Cherry Mice, it’s time to get creative and have some fun! Use your imagination and come up with new ways to decorate your mice.
You can even get the kids involved in the decorating process. Just be sure to use safe, edible materials so that everyone can enjoy the finished product.
Make a bunch of these mice for your next holiday party. They’ll be a big hit with your kids! Plus, they’re a great way to surprise the guests!
